Chicken Marinade Inspired by “Mom on Timeout”

Inspired by this blog post

Ingredients and Deviations
– 1/2 cup extra virgin olive oil
I used about 1/3 cups
– 
1/2 cup balsamic vinegar or other vinegar
I used apple cider vinegar, which was the only vinegar I had
– 1/4 cup soy sauce
Specifically, low sodium Kikkoman
– 
1/4 cup Worcestershire sauce
– 1/8 cup lemon juice
I didn’t put any of this bc I didn’t have it
– 3/4 cup brown sugar
I think I used about 1/3?
– 2 tsp dried rosemary
Didn’t have this, but I definitely would’ve added it if I had
– 2 tbsp Dijon or Spicy Brown mustard
Used Dijon
– 
2 tsp salt
– 1 tsp ground black pepper
I only have whole kernels you need to grind. I dunno how much I put in. Probs < 1 tsp.
– 2 tsp garlic powder
– 6 chicken breasts or 3.5 lb chicken
It was like 7 chicken breasts??

Method
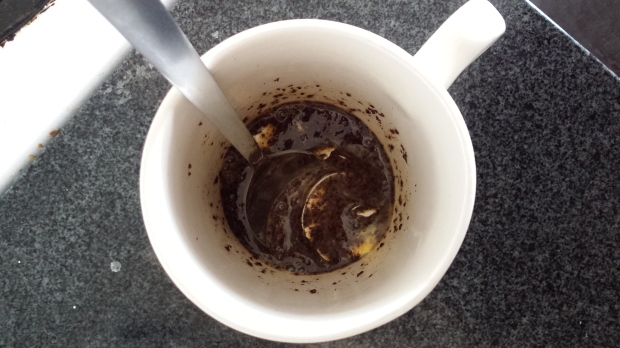
Puts the whole chicken breasts into the marinade after poking holes in them with a fork on both sides and cutting thick parts in half, opening the breast to thin it out. I put the whole bowl in the fridge for about 24 hours.

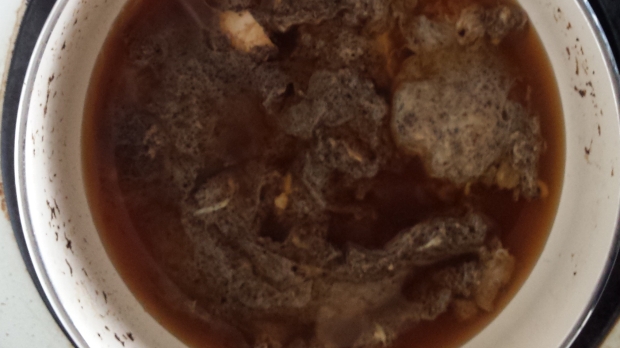
I baked the chicken breasts on a cookie tray (low key bad idea – there was a lot of juice) at 425 F for 20 min. Then, I removed them from the oven and let them rest for about 5 min before slicing them.

Results
Juicy chicken!!! For the most part. Some pieces were a little tough, but I think those were the less tender parts of the meat, so I blame the cut of meat more than, say, the bake.

5-stars to this marinade! I can only image how delicious the true recipe (with rosemary, especially) must be. Regardless, I will absolutely return to this marinade again. A million percent better than what I was about to do, which was just marinade in straight up soy sauce. So glad I had a moment of “huh, I wonder what soy sauce marinades there are”.

Future Directions
Probably just to make this again! Also, if I get dried rosemary, I think it’d be worth adding. Ditto on the lemon juice. Tenderize the meat more, possibly with a mallet (aka “meat tenderizer”). Other than that, I really don’t think there is much else to change.

Edit: I chatted with a friend and was recommended to try 400 F for 10-12 min. The “dryness” in parts of the meat aren’t necessarily due to the cut; they can be remedied by the length of baking time. SO, next time, this is what I want to try.

Sriracha Tuna Chili

20180505_16555620180505_165823.jpg

20180505_165539Recipe inspired by here (be sure to click the link for the pdf); pictures mine


Ingredients
– 6 can drained Chunk White Albacore Tuna
– 2 tbsp canola oil
– 4 tbsp minced garlic (from a jar)
– 1 medium yellow onion, diced (241 g)
– 4 green peppers, sliced (638 gram)
– 1/2 cup dry red kidney beans
– 1/2 cup dry black beans
– 1 tbsp chili powder
– 10 tsp Sriracha
– 1 container of Safeway’s hot salsa fresca (457 g)

Deviations and Other Notables
– I didn’t use small whole tomatoes, since I figured the salsa would be enough
– I only used green peppers instead of including red and yellow, because green peppers are cheaper
– I didn’t follow the recipe posted on the website exactly, especially when it came to amount of minced garlic (recipe says 4 cups) and salsa (says 3/4 cup). I figured something must’ve happened when the author/cook uploaded his recipe and assumed he meant to say 4 tbsp of minced garlic. Additionally, I noticed 3/4 cup salsa wasn’t enough, so I added more. It wasn’t until I finished making the chili that I noticed there was a link to a pdf of the original recipe which looks more accurate. It says 4 cloves of minced garlic, for instance (… oops haha!) and only 10 tbsp (165 g) of salsa… which still doesn’t seem like enough to me. Maybe his salsa is more watery?
– I didn’t have any foresight, so I didn’t soak my dried beans overnight. Instead, I boiled them in water as I prepared the veggies and the tuna for the meal. By the time I needed them, they were soft. Just keep an eye on them and make sure they’re totally submerged in water so they all cook evenly. I drained mine mostly of water, but then I noticed the black bean water looked kinda thick, and I wanted to keep it! So I added it all to the chili.
– I topped mine with some fat free mozzarella cheese! It was yummy. Also good in a whole wheat wrap. Would recommend that as the food vehicle of choice here.
– Note: How I usually do garlic + onion + veg is let the garlic brown in the oil a little, then add the onion + veg and let it get soft without adding water (the onion and veg release their own water), and then add all the other stuff.

Thoughts and Future Directions
This came out smelling so good. Wowza. And it was pretty spicy too, which I enjoyed. It still smells like tuna, which might turn some people off, but I don’t mind. I love the colors and the beans. I really like black beans, I’ve discovered once again. I don’t usually buy them, but I think I’ll make more of a habit to include them in my meals. Next time, I think I might add corn to make it a bit sweeter. Or I’d think about adding different spices. The original author/cook used a chili spice packet, noted in the pdf, so I might try that!

– I like black beans
– Spicy!
– Tastes great
– Nice balance of tuna and veggies
– 10/10 would make again (even if squeezing water from the tuna is a pain)
– Maybe add corn for sweetness?
– Try a chili spice packet?

Macros (total; should serve 6)
*doesn’t include the cheese
1546 cal
163 g carb
166 g protein
39 g fat

Buttery Jam Thumbprint Cookies

Buttery-Jam-Thumbprint-Cookies-2buttery-jam-thumbprint-cookies-6Recipe and photos above from here on Chew Out Loud.


First of all, WOW!! These cookies are the bomb! After making those sad excuses for food last week, I’m so proud of myself for making these delicious thumbprint cookies. I was (and remain) intrigued that these cookies have absolutely zero eggs in them. They’re incredibly easy to make, idiot-proof, and delightful! I totally want to make these little colorful guys again.

Deviations and Other Notables
– I don’t have a stand mixer, so I just used a spoon to cream the butter and sugar together. This worked surprisingly well. When I moved on to the next step, I could still see some clumps of normal butter in the creamed butter, but despite trying to press the butter against the side of my bowl with the spoon, I couldn’t get rid of them. I don’t think it affected the cookies at all, though, so if this happens to you, don’t worry.
– I microwaved one stick of butter for 30 min, and some of it melted. I learned my lesson and microwaved the second stick for only 10 sec, which was perfect. Although the recipe said not to melt the butter, I think this worked out just fine. I wouldn’t repeat this mistake, but if you butter melts a tad, I’m just saying it’s not the end of the world.
– Instead of measuring out the salt, I used my salt grinder and grinded about 1.5 revolutions worth of kinda coarse salt into the dough mixture.
– I poured in a little flour at a time, mixed to incorporate completely, and then added more flout until I got the most beautiful ball of dough.
– I was impatient (and it was also late in the evening/night), so I only let my dough ball chill for 30 min, which was fine!
– I thought pressing my thumb into the cookie ball wasn’t giving me the deep jam-/preserve-filling well that I wanted. So, I switched to trying my pinky and then also my middle finger. I think the pinky did the best job at getting depth without cracking the dough too much, but the larger fingers did a better job at breadth, which I think is equally important. I’m unsure how to best make the divots; I kinda used all my fingers to get an okay shape.
– I used Safeway’s Signature Select blackberry preserves to fill my cookies. (I know. Fancy, right?) I filled the holes using a spoon and my finger to guide just enough preserves into the hole without overfilling (in most cases… I ate the ones that spilled over).
– 20 min at 325 F was probably just the right amount of time for my batch. They were brown on the bottom and lightly brown on the top. I guess I could’ve left them to get more golden, but this isn’t a baking contest.

Thoughts
This recipes is excellent. It’s simple. It’s easy to follow. It doesn’t require any weird, obscure, expensive ingredients (except for the vanilla extract, I suppose). It doesn’t require any fancy pants baking equipment. And the product is fabulous. I love it.

Future Directions
I want to figure out a better way to make the holes so they hold the filling well. I got this to work for some of the cookies but not all. I also want to try to make them look more uniform. Finally, I’d love to try different fillings so that, when I give these to people, they have an array of fun colored treats to pick from!

These are what my beauties look like!! I’m so pleased!! I’ll put powdered sugar over them when I’m ready to present them to my friends. I think if I powdered them now, it would look funky tomorrow.

Before baking:

snapchat-361464109.jpg

After baking:
snapchat-149807533.jpg

Microwaved Yams

yaaam.jpgIdea from here; photo my own


Method
– grab your yam and stab it with a knife, aiming for several thin slices dispersed on both sides
– throw it in the microwave for 5 min
– flip the yam onto its other side and microwave another 5 min
– cut open
– apply a thin sliver (or thick, if that’s how ya roll) of butter
– feel free to jazz it up with cinnamon and/or brown sugar too

Observations
– extremely fast; extremely easy
– 100% delicious. Literally tastes as if you put hours of effort into preparing these, and they remind me of a delicious, home-cooked Thanksgiving meal. A total winner! Seriously surprising how great these are. Yams are just damn delicious.

Swedish Egg Coffee

20180208_102527


20180208_103639.jpg

20180208_103645


Got inspired from this cool coffee blog. Pictures my own.

Ingredients
– 1 egg
– 1 to 1 ½ tbsp of coffee
– 1 cup of water
– 1 cup of cool/cold water
– sugar and milk to taste

Deviations and Other Notables
– I used 1 1/2 tbsp of coffee
– The coffee I used was definitely not coarse; it was ground for a coffee machine
– The second cup of water I used was probably somewhere in the cool-to-RT range

Method
1. Boil 1 cup of water
2. Crack the egg into a cup and toss the eggshell in too; add the ground coffee to the cup
3. Stir, stir, stir!
– I crushed the eggshell up a bit to aid in stirring. Don’t worry how small the eggshell might get, because we’ll strain it later (even though straining might not be so necessary).
4. When the water is boiled, add the egg/coffee slurry
5. Boil 5 min
6. Remove from heat and add the cool/cold water
– The actual instructions say “ice cold” water, but I just turned the faucet to cold and used that. Can’t be sure if the temperature matters that much. By the time I got around to adding it, the water was about at RT anyway. Just make sure it’s somewhere in the cool/cold range. The idea is probably just to lower the temperature enough from boiling to make it drinkable as well as to stop brewing the coffee.
7. Strain
– I poured the coffee from the pot into my French press… but I honestly don’t think it was necessary. The egg clings onto all the grounds really well, so it was pretty much separated just fine. I don’t think I’d bother dirtying my French press again for this, but if straining it makes you feel more comfortable, obvi go for it.
8. Add milk and sugar to taste
– I didn’t put any.
9. Enjoy!

Observations
– It smells very mildly of coffee.
– The color is light brown, almost like coffee with some milk in it. Or tea, but less transparent. Or dirty water.
– It tastes incredibly mild, even without milk and sugar.

Thoughts
I am honestly very impressed, especially considering that I used some trash coffee that always came out tasting burnt, bitter, and gross. I was torn between struggling through drinking that trash coffee, drowning the bitterness with milk, or blending it with decent coffee to avoid throwing out about half a tub or more of the stuff. This salvaged that coffee for me.

The flavor of it was so smooth. Impressive to achieve that without adding milk or sugar, I’d say. Really amazing. Like no coffee I’ve had before, for sure. Really blown away by this one.

10/10 would try again! And 10/10 would recommend!

Future Directions
– Try it with just eggshell
– Try adding actual “ice cold” water
– Play around with how much coffee I’m adding
– Make more at once, because 2 cups of this deliciousness was not enough